Connect to Dynamics 365 database
Presentation
A new feature is coming this year and is only available as a preview for the moment. You are now able to connect your Dynamics 365 database. This SQL connection provides read-only access to the CDS environment. You can see each column type of each entity and you can execute SQL requests directly in the databases.
Prerequisites
- Having a dynamics 365 Online account with administrator credentials
- Set up an environment that has at least version 9.1.0.17437
- Download Microsoft SQL Server Management Studio or Power BI Desktop depending on which software you want to use.
Check your environment version
As I said in the prerequisites, your environment you want to access must have at least version 9.1.0.17437.
To verify that, go to your environment (https://********.crm4.dynamics.com), Settings -> About

Here you can see the server version
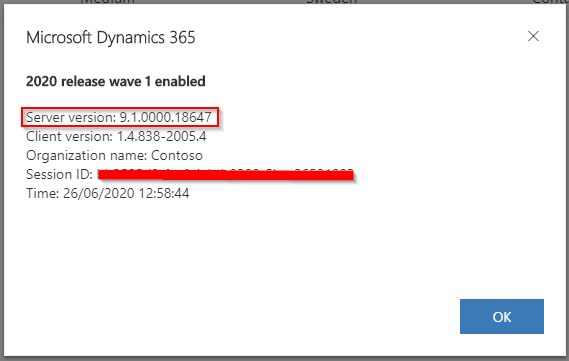
If the version is higher than 9.1.0.17437, we can go to the next step.
Enables Tabular Data Stream (TDS) endpoint
This option is only available for environments enabled for this public preview and with a recent version.
I advise using Internet Explorer to do it.
To enable it, go to your environment list in the Power Platform admin center -> https://admin.powerplatform.microsoft.com/environments
From there, select your environment and open its settings.
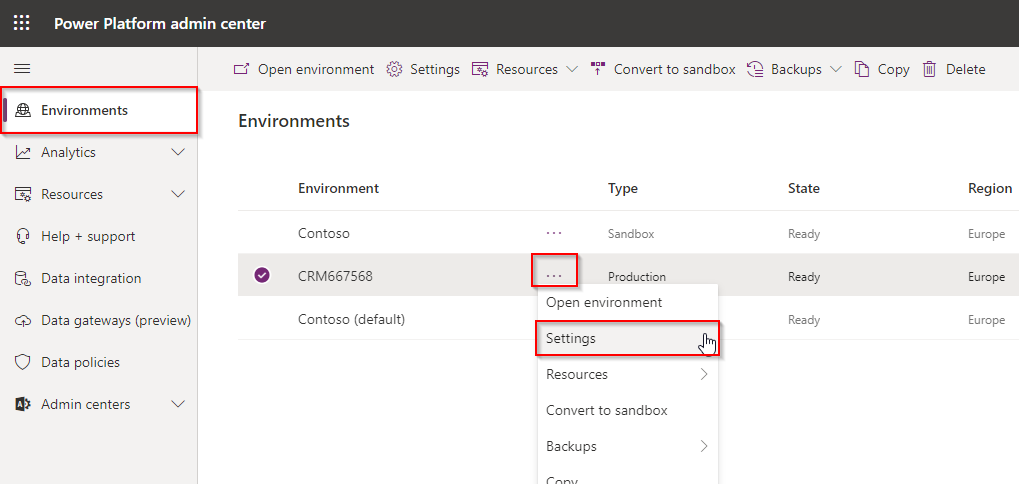
In the Settings page, open up the Product section and click on Features.

If the link doesn't work, you can make it yourself.
First, take the id of your environment in the URL:

Then generate the Features link: https://admin.powerplatform.microsoft.com/environments/yourenvironmentid/settings/Features
You can easily activate the TDS from this page:

Now you can access your data as read-only.
We will see how to connect using Microsoft SQL Server Management Studio or Power BI Desktop, depending on what you prefer.
Using Microsoft SQL Server Management studio
Open your Microsoft SQL Server Management Studio and connect to your environment.
- Server Type: Database Engine
- Server name: your CRM url and the port 5558 separated with a comma -> ********.crm4.dynamics.com,5558
- Authentication: Azure Active Directory - Password
- User name: your admin username
- Password: your admin password
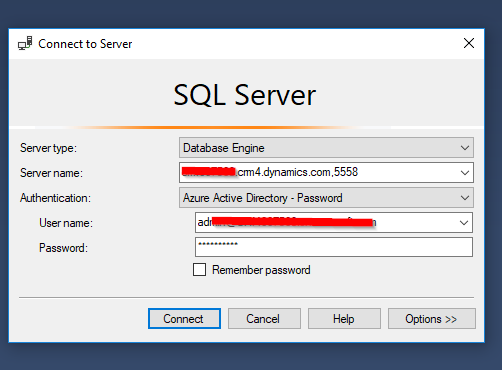
Click on Connect.
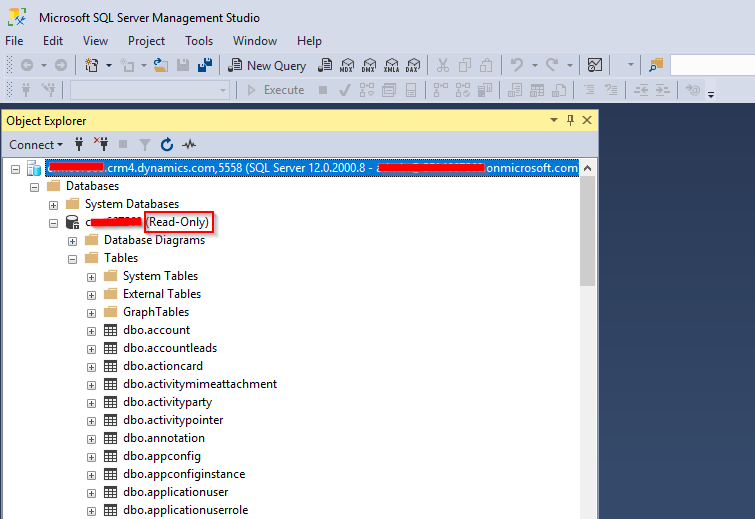
Now you are connected, you can access the database in read-only mode.
Following the user you are connected with, you will be limited to request the entities you have the read right set in the CRM.
You can use SQL to request the database.
Be aware that not all operations are supported within this feature. You can only use the following:
- SELECT
- UNION
- JOIN
- FILTER
- Batch operations
- Aggregate operations like COUNT() and MIN() or MAX()
Performance
On the following link, a performance comparison has been done between the FetchXML Builder add-on for the XrmToolBox and the T-SQL.
The performance will really depend on the query you are running, the number of column you are requesting.
Read the Joe D365 article which really well explains the tests and gives great conclusions about them.
Using Power BI Desktop
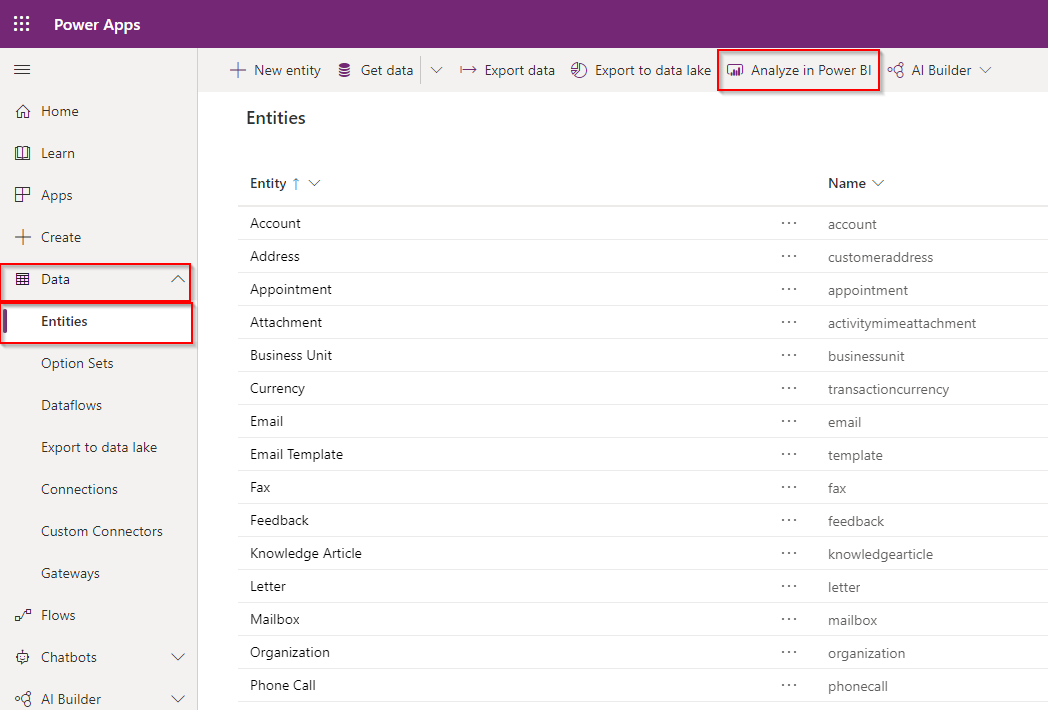
To open your database through Power BI Desktop, we will generate a pbids file in Power Apps.
Connect to Power Apps, then go to Data -> Entities
Then download the pbids file clicking on Analyse in Power BI
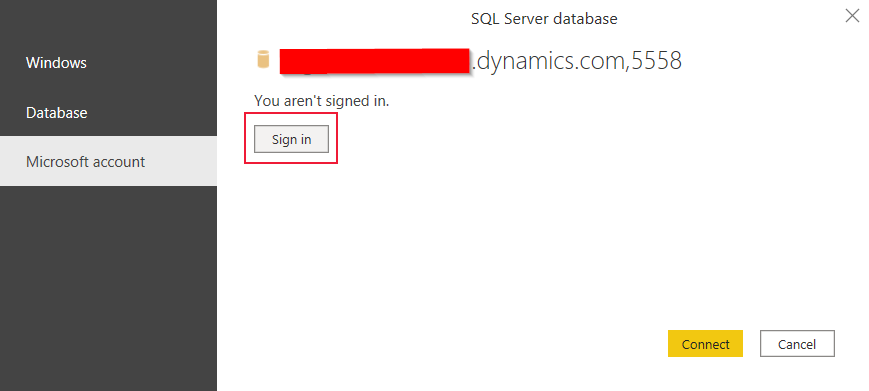
Now, double-click on the downloaded file. it should be opened with Power BI Desktop.
You will be asked to sign in with your credentials:
Once signed in, you have now access to read-only to all your tables.
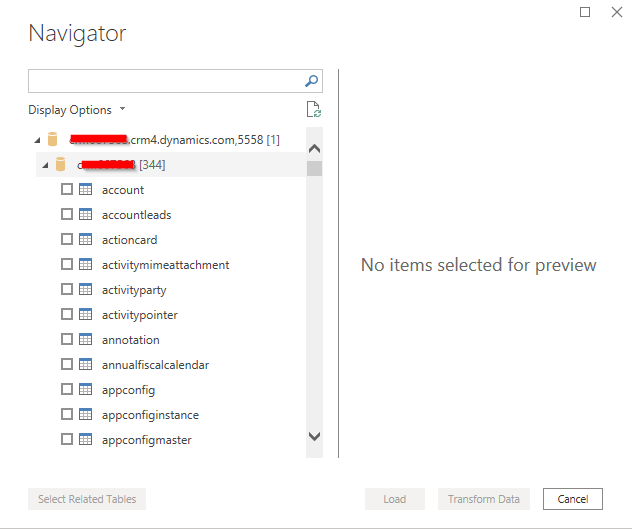
As you can notice in the application, the storage mode used is Direct Query. It means that data are loaded in real-time!
Following the user you are connected with, you will be limited to request the entities you have the read right set in the CRM.
You can start working with them.
Limitations
- This is a preview feature and you're not supposed to use it for a production environment.
- The databases are only accessible in read-only mode.
- Not every operation is available in SQL within this feature.

0 Comments